free page hit counter

Air Fryer Bread

Air Fryer Bread: A Simple and Delicious Loaf Made Right in Your Air Fryer

Introduction

In recent years, the air fryer has transformed kitchens around the world. Initially embraced for its ability to mimic deep frying with little to no oil, this powerful countertop appliance has grown far beyond just reheating leftovers or crisping up frozen snacks. One of the most delightful surprises for home cooks and baking enthusiasts alike is the ability to bake fresh bread in the air fryer—a discovery that’s opened up new possibilities for quick, easy, and delicious homemade loaves.

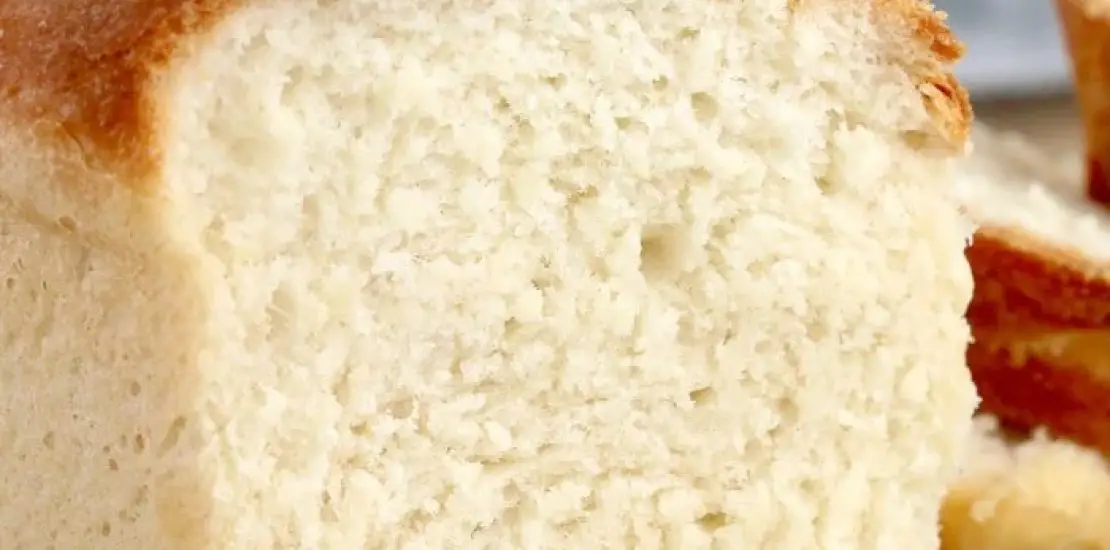
Why bake bread in an air fryer? First, it’s incredibly convenient. You don’t need to preheat a massive oven, and the smaller space inside the fryer leads to faster cooking times. Second, it’s a game-changer for beginners, offering a simple and forgiving environment to create beautiful, golden loaves. Third, the air fryer delivers a perfect crusty outside and a fluffy interior—the signature of great bread—without the need for complicated techniques.

Whether you’re a seasoned baker or a novice looking to try something new, air fryer bread is an excellent place to begin. In this article, we’ll guide you through every step of the process, from gathering your ingredients to enjoying your first warm slice slathered with butter. Plus, we’ll include variations, troubleshooting tips, and ideas for serving that will elevate your baking journey.

Let’s get started!

Homemade Air Fryer Bread Recipe

Ingredients

This recipe makes one small to medium loaf, perfect for most air fryer baskets.

Basic Ingredients:

  • 2 cups (250 g) all-purpose flour or bread flour

  • 1 teaspoon salt

  • 1 tablespoon sugar (optional, helps with browning and flavor)

  • 2 teaspoons active dry yeast or instant yeast

  • ¾ cup (180 ml) warm water (about 105–110°F or 40–43°C)

  • 1 tablespoon olive oil or melted butter

Optional Add-ins and Toppings:

  • 1 teaspoon dried herbs (rosemary, thyme, or oregano)

  • ¼ cup grated cheese (cheddar, parmesan)

  • 2 tablespoons seeds (sunflower, sesame, chia)

  • Egg wash for a golden crust

  • Flaky sea salt for topping

Tools You’ll Need

  • Air fryer (with a basket large enough to hold a small loaf pan or parchment-lined insert)

  • Mixing bowl

  • Loaf pan (silicone or metal, 6” or smaller) or cake pan

  • Measuring cups and spoons

  • Clean kitchen towel or plastic wrap

  • Pastry brush (optional, for egg wash)

Step-by-Step Instructions

1. Activate the Yeast (If Using Active Dry Yeast)

In a small bowl, combine the warm water, sugar, and active dry yeast. Stir gently and let it sit for about 5–10 minutes, or until it becomes foamy on top. This indicates the yeast is alive and ready to go.

Note: If you’re using instant yeast, you can skip this step and mix it directly with the dry ingredients.

2. Mix the Dough

In a large mixing bowl, combine:

  • The flour

  • Salt

  • Any dry add-ins like herbs or seeds

  • Activated yeast mixture (or dry yeast if instant)

  • Olive oil or melted butter

Mix with a spoon or hands until a shaggy dough forms. If the dough is too dry, add a tablespoon of warm water at a time. If it’s too wet, sprinkle in more flour until manageable.

3. Knead the Dough

Turn the dough out onto a lightly floured surface and knead for 8 to 10 minutes, or until it becomes smooth and elastic.

If using a stand mixer with a dough hook, mix on medium-low for about 5–6 minutes.

4. First Rise (Proofing)

Form the dough into a ball and place it in a lightly oiled bowl. Cover with a towel or plastic wrap and let it rise for 1 hour, or until doubled in size.

Ideal rising temperature is a warm, draft-free area (around 75–80°F or 24–27°C).

5. Shape the Dough

Once risen, punch down the dough gently. Shape it into a round or oval loaf, or press it into a greased loaf pan or line your air fryer basket with parchment paper.

6. Second Rise

Let the shaped dough rise again for about 30–40 minutes until slightly puffed. This second rise ensures a tender, airy crumb.

7. Preheat the Air Fryer

Preheat your air fryer to 320°F (160°C) for 3–5 minutes.

8. Bake the Bread

Carefully place the pan or shaped dough into the air fryer basket. Set the timer for 15–20 minutes, depending on the size of the loaf and your air fryer model.

Check for doneness:

  • Tap the bottom of the bread—it should sound hollow.

  • Internal temperature should reach about 190°F (88°C) for soft bread or 200°F (93°C) for crusty bread.

If the top browns too fast, loosely tent with foil halfway through cooking.

9. Cool Before Slicing

Let the bread cool in the pan for 5 minutes, then transfer it to a wire rack. Wait at least 20–30 minutes before slicing. This helps set the crumb and makes slicing easier.

Recipe Variations

Want to jazz up your air fryer bread? Try these tasty spins:

Garlic Herb Bread

Add 1 tsp garlic powder and 1 tsp dried Italian herbs to the flour. Brush the top with melted garlic butter before the second rise.

Cheese Bread

Mix in ¼ cup of grated cheddar or parmesan cheese into the dough. Sprinkle a little extra on top before air frying.

Sweet Cinnamon Swirl

Add 1 tablespoon sugar to the dough and, after the first rise, roll the dough flat. Spread a mixture of cinnamon, butter, and sugar, then roll and shape into a loaf.

Whole Wheat Version

Use half whole wheat flour and half all-purpose flour. Add an extra tablespoon of water if needed for hydration.

Seeded Multigrain Loaf

Mix in a tablespoon each of sunflower seeds, flaxseeds, and oats. Brush the top with water and sprinkle extra seeds before baking.

Tips for Success

1. Check Air Fryer Capacity

Make sure your loaf fits in the basket with enough room for airflow. A round cake pan or small loaf pan usually works best.

2. Monitor the Browning

Air fryers brown the top quickly, so check around the 10–12 minute mark. Use foil if the top crust darkens too fast.

3. Use Parchment or Silicone Molds

Line the bottom with parchment to prevent sticking. Silicone molds are excellent since they’re flexible and heat-resistant.

4. Avoid Overproofing

Don’t let the second rise go too long, or the loaf might collapse in the air fryer. A 30-minute second rise is usually perfect.

5. Don’t Skip the Rest Time

Resist the urge to cut the bread immediately. Cooling time allows steam to escape, setting the texture and improving flavor.

How to Store and Reheat

Storing Air Fryer Bread

  • Room temperature: Wrap in foil or store in a bread box for up to 3 days.

  • Refrigerator: Not recommended—it dries out the bread.

  • Freezer: Slice and store in freezer bags. Freeze up to 2 months.

Reheating Tips

  • In air fryer: 2–3 minutes at 300°F (150°C) to revive crust.

  • In toaster: Perfect for quick slices.

  • Microwave: Wrap in damp paper towel and heat for 10–15 seconds for softening.

Serving Ideas

Freshly baked air fryer bread pairs beautifully with a wide range of toppings and dishes:

  • Breakfast: Toasted with butter, jam, or avocado

  • Lunch: Sandwich base with meats, cheeses, and veggies

  • Dinner: Served with soups, stews, or pasta

  • Snack: Simply dipped in olive oil and balsamic vinegar

Common Questions (FAQ)

Can I double the recipe?

Only if your air fryer is large enough. Otherwise, it’s better to make two small loaves rather than risk overcrowding.

Can I use a bread machine or mixer?

Yes! Use them for kneading, then proceed with the rise and baking in the air fryer.

What type of flour is best?

Bread flour gives better chew and structure, but all-purpose works fine for a softer loaf.

Why didn’t my bread rise?

Possible reasons:

  • Yeast was expired or killed by hot water

  • Dough was over-kneaded or under-kneaded

  • Rise temperature too cold

Can I make gluten-free air fryer bread?

Yes, using a reliable gluten-free flour blend and following a gluten-free bread recipe base.

Conclusion

Air fryer bread is a revolutionary twist on traditional baking—bringing the joy of homemade bread into the reach of anyone with a countertop air fryer. It’s fast, satisfying, and surprisingly simple. With just a few basic ingredients and minimal effort, you can enjoy a golden, crusty loaf that rivals those from a bakery.

Whether you’re baking for the first time or looking to streamline your cooking routine, this recipe will have you hooked. You’ll quickly see why thousands of home bakers are ditching the oven and embracing the convenience of the air fryer. The best part? You’re not limited to plain loaves—herbs, cheese, seeds, cinnamon, and more are all easy to integrate into this versatile base.

Next time you crave warm, fresh bread, skip the store and head to your kitchen. Grab some flour, yeast, and your air fryer—then bake, slice, and enjoy the simple pleasure of homemade bread, no oven required.

Leave a Comment