
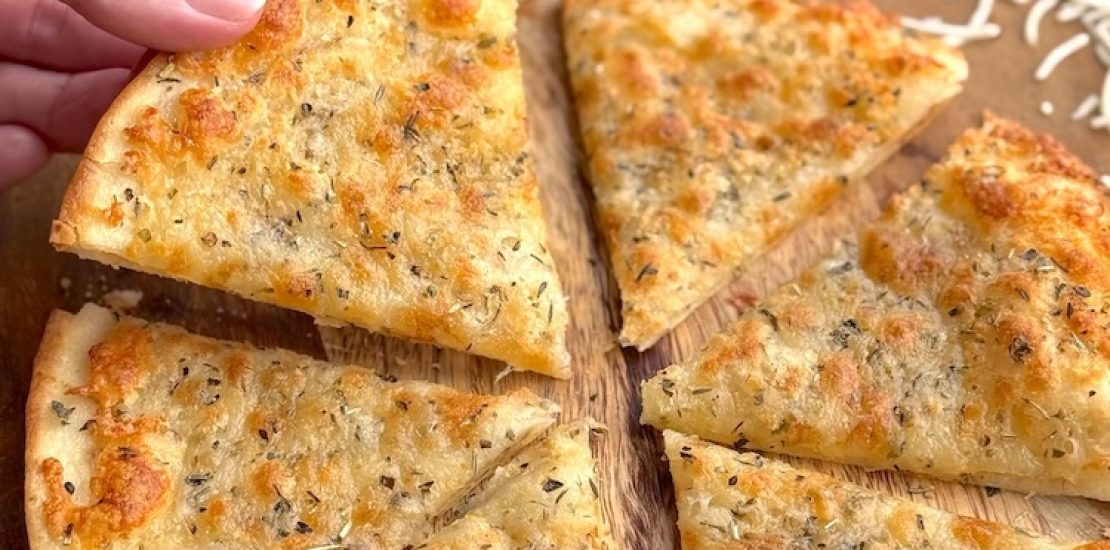
Air Fryer Cheesy Tortilla Garlic Bread
Introduction
Garlic bread has long been a beloved comfort food for people across the globe. Its crisp crust, rich buttery garlic flavor, and soft interior make it the perfect companion for a variety of meals or a delicious snack all on its own. Over time, the classic recipe has seen countless variations, with one particularly innovative twist being the Air Fryer Cheesy Tortilla Garlic Bread. This version brings together the irresistible taste of garlic bread, the delightful crunch of tortillas, the convenience of an air fryer, and the melty goodness of cheese, resulting in a dish that is quick, simple, and absolutely mouthwatering.
In today’s fast-paced world, home cooks and food lovers alike are always on the lookout for recipes that combine ease, speed, and flavor. The air fryer has revolutionized home cooking by making it possible to prepare traditionally time-consuming or calorie-laden dishes in a healthier, faster, and often even tastier way. The Air Fryer Cheesy Tortilla Garlic Bread stands as a testament to the versatility of this kitchen gadget, offering a delicious twist on a timeless classic.
This article will guide you through every detail of making Air Fryer Cheesy Tortilla Garlic Bread, from choosing the best ingredients to perfecting the cooking process. Whether you’re looking to whip up a quick appetizer for guests, a snack for the family, or a side dish to accompany your favorite meal, this recipe will quickly become a staple in your kitchen. By the end of this article, you’ll have a thorough understanding of how to create this delicious dish and several tips to customize it to your liking.
The Magic Behind Air Fryer Cheesy Tortilla Garlic Bread
Before diving into the step-by-step recipe, it’s helpful to understand why this version of garlic bread is so special. Traditional garlic bread is typically made using a baguette or Italian loaf, slathered in butter and garlic, and baked to perfection. However, tortillas offer a unique base that transforms the experience entirely. Here’s why tortillas and air fryers make an exceptional pairing for garlic bread:
1. Tortillas as a Base
Tortillas provide a thin, crisp canvas that allows the flavors of garlic, butter, and cheese to shine through. Their lightness makes them perfect for a quick snack or side without feeling overly heavy. Additionally, they crisp up beautifully in the air fryer, creating a texture that is simultaneously crunchy and chewy.
2. Cheese: The Star Ingredient
Adding cheese takes this garlic bread to the next level. The melted, gooey cheese contrasts wonderfully with the crisp tortilla and infused garlic butter. You can experiment with various cheeses like mozzarella, cheddar, parmesan, or a blend to create different flavor profiles.
3. The Air Fryer Advantage
Using an air fryer not only reduces the need for excessive oil but also shortens cooking time significantly. The air fryer’s circulating hot air ensures even cooking, producing a perfectly crisp exterior while keeping the cheese deliciously melted.
Ingredients: Selecting the Best for Flavor
To achieve the best possible result, start with high-quality ingredients. Here’s what you’ll need for the perfect Air Fryer Cheesy Tortilla Garlic Bread:
Core Ingredients:
-
Tortillas (4 medium-sized): Choose flour tortillas for the best texture. They hold up well in the air fryer and crisp up nicely.
-
Unsalted Butter (1/2 cup, softened): High-quality butter adds rich flavor and helps the garlic and herbs adhere to the tortillas.
-
Fresh Garlic (4-5 cloves, minced): Fresh garlic gives the bread its signature robust flavor.
-
Mozzarella Cheese (1 cup, shredded): Melts beautifully and offers a stretchy, gooey texture.
-
Parmesan Cheese (1/2 cup, grated): Adds sharpness and depth.
-
Parsley (2 tablespoons, finely chopped): Provides a fresh, vibrant note.
-
Salt (1/2 teaspoon): Enhances all the flavors.
-
Olive Oil Spray: Helps to achieve an even golden finish.
Optional Ingredients:
-
Chili Flakes: For a bit of heat.
-
Italian Seasoning: Adds extra herbs and depth.
-
Garlic Powder: Amplifies garlic flavor if desired.
-
Black Pepper: For a subtle kick.
Equipment Needed
-
Air Fryer
-
Small Mixing Bowl
-
Pastry Brush or Spoon
-
Knife and Cutting Board
-
Grater (for fresh cheese)
Step-By-Step Recipe: Air Fryer Cheesy Tortilla Garlic Bread
Let’s break down the process into clear, manageable steps to ensure perfect results every time.
Step 1: Prepare the Garlic Butter Mixture
-
In a small mixing bowl, combine the softened butter and minced garlic.
-
Add in the salt, chopped parsley, and any optional seasonings such as garlic powder, Italian seasoning, or chili flakes.
-
Mix thoroughly until all ingredients are well incorporated.
Tip: You can prepare this mixture ahead of time and store it in the refrigerator for up to a week, making it easy to whip up garlic bread whenever the craving strikes.
Step 2: Prepare the Tortillas
-
Lay the tortillas flat on a clean surface.
-
Using a pastry brush or spoon, evenly spread the garlic butter mixture across each tortilla, ensuring the entire surface is covered.
Tip: Don’t overload the tortillas with butter to avoid sogginess. A thin, even layer is sufficient.
Step 3: Add the Cheese
-
Evenly sprinkle mozzarella cheese over the buttered side of each tortilla.
-
Follow with a layer of grated parmesan cheese for added flavor and texture.
-
If desired, sprinkle a few chili flakes or a touch of black pepper over the cheese for an extra kick.
Step 4: Preheat the Air Fryer
-
Preheat your air fryer to 350°F (175°C) for about 3 minutes.
-
This ensures the tortillas begin crisping immediately when placed inside.
Step 5: Air Fry the Tortilla Garlic Bread
-
Lightly spray the air fryer basket with olive oil spray to prevent sticking.
-
Place the tortillas into the air fryer basket. Depending on the size of your air fryer, you may need to cook one or two at a time.
-
Air fry at 350°F (175°C) for 5-7 minutes or until the edges are golden brown and the cheese is fully melted and bubbly.
Tip: Keep a close eye during the last minute of cooking to prevent burning.
Step 6: Serve
-
Remove the cheesy tortilla garlic bread from the air fryer and let it cool for 1-2 minutes.
-
Slice into wedges using a pizza cutter or sharp knife.
-
Garnish with additional chopped parsley if desired.
-
Serve immediately while hot and crispy.
Variations and Customizations
One of the best aspects of this recipe is its flexibility. You can tailor it to your tastes or dietary needs. Here are some creative variations to try:
1. Gluten-Free Version
Use gluten-free flour tortillas to accommodate those with gluten sensitivities or celiac disease.
2. Vegan Option
Substitute dairy butter with plant-based butter and use vegan cheese alternatives. The recipe retains its indulgent feel while being entirely plant-based.
3. Spicy Kick
Add finely chopped jalapeños, sriracha drizzle, or extra chili flakes to spice things up.
4. Herb Lovers
Experiment with additional fresh herbs like basil, rosemary, or thyme to add different layers of flavor.
5. Meaty Upgrade
Sprinkle cooked and crumbled bacon, pepperoni slices, or shredded chicken on top of the cheese layer before air frying for a heartier version.
6. Sauce Dippers
Pair with marinara sauce, ranch dressing, or garlic aioli for dipping to add even more flavor.
Nutritional Information (Per Serving)
-
Calories: ~250 kcal
-
Protein: 10g
-
Carbohydrates: 20g
-
Fat: 15g
-
Fiber: 1g
-
Sugar: 1g
-
Sodium: 400mg
Note: Nutritional values are estimates and may vary depending on the exact ingredients used.
Storage and Reheating
Storage:
-
Allow leftovers to cool completely.
-
Store in an airtight container in the refrigerator for up to 3 days.
Reheating:
-
Reheat in the air fryer at 300°F (150°C) for 2-3 minutes to restore crispiness.
-
Avoid using the microwave, as it may make the tortillas soggy.
Common Mistakes to Avoid
To ensure your Air Fryer Cheesy Tortilla Garlic Bread turns out perfectly every time, be mindful of these common pitfalls:
-
Overloading with Butter or Cheese: While tempting, too much of either can result in greasy, soggy bread.
-
Skipping Preheat: Preheating the air fryer helps achieve even crispiness.
-
Overcooking: The tortillas cook quickly; overcooking can lead to burnt edges and dried cheese.
-
Using Cold Butter: Softened butter spreads more evenly than cold butter.
Pairing Suggestions
This cheesy tortilla garlic bread makes an excellent addition to many meals or can stand alone as a satisfying snack. Here are some pairing ideas:
-
Soups: Tomato basil soup, creamy mushroom soup, or minestrone.
-
Pasta Dishes: Spaghetti carbonara, fettuccine alfredo, or lasagna.
-
Salads: Caesar salad, Greek salad, or Caprese salad.
-
Grilled Meats: Grilled chicken, steak, or seafood.
Why Air Fryer Cheesy Tortilla Garlic Bread is a Must-Try
-
Quick Preparation: Ready in under 15 minutes from start to finish.
-
Minimal Ingredients: Uses pantry staples you likely already have.
-
Healthier Alternative: Less oil and fat compared to traditional frying.
-
Customizable: Easily adaptable to various dietary preferences.
-
Family Friendly: Kids and adults alike will enjoy the cheesy, garlicky goodness.
Conclusion
Air Fryer Cheesy Tortilla Garlic Bread is a fantastic fusion of traditional flavors and modern convenience. By using tortillas as the base, you achieve an irresistible crispiness that perfectly complements the richness of garlic butter and the gooey, melty cheese on top. The air fryer makes the entire process fast, efficient, and practically foolproof, delivering consistently delicious results every time.
This recipe is perfect for busy weeknights, unexpected guests, or simply when you’re craving a warm, cheesy snack. Its versatility means you can tailor it to your personal tastes, whether that’s making it spicier, adding extra herbs, or creating a heartier version with protein toppings.
In a world where time is precious but the desire for comforting, flavorful food remains strong, recipes like Air Fryer Cheesy Tortilla Garlic Bread demonstrate how creativity and technology can come together to elevate even the simplest ingredients into something extraordinary. Whether you’re a seasoned home cook or just starting your culinary journey, this recipe offers a delightful, easy-to-master option that is sure to earn a permanent spot in your cooking repertoire.
